What's in this teardown
- Before you start: what to settle before you drive
- Step 1: Identify your charge port and where it sits
- Step 2: Check your manufacturer’s current guidance
- Step 3: Confirm the site in the network’s own app
- Step 4: Park for the cable, not for the parking space
- Step 5: Connect, start the session, and verify the handshake
- Step 6: End the session cleanly and clear the stall
- Why this teardown lists no compatible vehicles
- Native port or adapter: what actually changes
- What an adapter does, and what it does not do
- Illustrative minutes lost to each unchecked unknown
- Stall geometry and why the cable is short
- A worked example: one 33 minute session
- Where the minutes go in a first session
- Account and payment setup versus a CCS network
- Compatibility is four separate gates, not one
- When the session will not start: a fixed order
- What caps your charging speed on an unfamiliar stall
- Common mistakes on a first session
- Safety limits at the stall
- Keeping your own information current
- The non-Tesla session checklist
- The bottom line
Using a Tesla Supercharger with a non-Tesla EV is mostly a connector-transition problem wearing a compatibility question’s clothes. The plug on your car may or may not match the cable on the pedestal, the account you charge on is probably not the one you already have, and the stall itself was laid out for a car whose charge port sits somewhere yours does not. None of that is hard. All of it is unfamiliar, and unfamiliar at 8 percent state of charge on an unlit lot is how a fifteen minute stop becomes a forty five minute one. This teardown turns the whole thing into six ordered moves you can rehearse in your driveway before you ever need them.
One thing to settle up front, because it shapes everything below: access rules, eligible vehicles, approved hardware and pricing on this network have all changed repeatedly, in stages, and they will change again. So this teardown states no roster of compatible cars, names no adapter product, and quotes no rate. Those facts have exactly two current sources, your vehicle manufacturer and the charging network’s own app, and any third-party page claiming to know them is telling you what was true when it was written. What does not change is the procedure, and the procedure is what follows. For what a session costs once you read the live rate, our Tesla charging cost teardown and our public charging cost teardown do the arithmetic, and for fitting stops into a route, our EV road trip teardown does the planning.
Key takeaways
- The six moves are always the same: identify your port, check your manufacturer's current guidance, confirm the specific site in the network's app, park for cable reach, connect and verify the handshake, then end the session and clear the stall.
- Access, eligible vehicles, supported hardware and pricing on this network change often, so the app and your manufacturer are the only sources current enough to act on.
- Your car either has a native port that matches the cable or needs an adapter your manufacturer supports; settle which one in your driveway, not at the stall.
- Stall geometry is the underrated failure: these bays were laid out for a port at the left rear corner, and a car with a front or nose port often has to park nose out or take a wider space.
- A failed start has a fixed troubleshooting order: reseat the connector, confirm the stall number in the app, check the payment method, then move stalls before you call anyone.
Before you start: what to settle before you drive
Everything that makes a first session slow is knowable in advance, at home, with no time pressure. Settle four things. First, your car’s DC fast charging port: what shape it is, and whether the network’s cable fits it directly or through hardware your manufacturer specifies. Second, your manufacturer’s current statement on whether your specific model is supported on this network at all, because support has rolled out in stages rather than all at once. Third, an account on the network with a payment method already attached and the app already installed and logged in, since the account flow is the part most likely to eat your stop. Fourth, the physical question: where on your car the charge port sits, and therefore how you will have to park.
Difficulty is genuinely low. Nothing here is electrical work, and nothing you touch is dangerous when the connector is seated properly and the hardware is undamaged. The realistic time cost of a first session is the charging itself plus a human overhead of roughly ten to fifteen illustrative minutes, and that overhead collapses toward two or three minutes on your second visit. The whole point of this preparation is to move the overhead into your driveway. Run your own battery, target and stall power through the companion on this page as you read, and price the energy in our cost calculator once the app shows you a rate.
Step 1: Identify your charge port and where it sits
Start with the hardware you already own. Walk to your car, open the charge port door, and look at the socket. You are answering two separate questions at once. The first is the shape: does the DC fast charging inlet match the connector hanging on the network’s pedestals, or is it the older, larger fast-charging shape with a separate pair of DC pins below the AC ones? A car with a native matching port plugs straight in. A car with the older shape needs a physical adapter in between, and which adapter is a question for step two, not for a forum. Our charging reference explains what each inlet shape is and why the transition created two populations of cars.
The second question is position, and it is the one drivers skip. Note exactly where the port sits: left rear quarter panel, right rear, driver’s side front fender, or the nose. Then note roughly how far that is from the back corner of the car in feet. That single measurement decides how you will park at a stall designed around a different assumption, and it is the difference between backing in confidently and doing a three point turn with a queue watching.
Write both answers down or, better, photograph the open port and keep the photo on your phone. When you arrive somewhere unfamiliar and a stranger offers advice, a photo of your own inlet settles the question faster than any conversation. This is also the step that tells you whether you need to carry anything at all, which is worth knowing before a trip rather than during one.
Step 2: Check your manufacturer’s current guidance
The compatibility question has one authoritative answer and it lives with the company that built your car. Open your manufacturer’s owner site or its own app and look for its current statement on charging at this network: whether your model year is supported, whether a software update is required first, what hardware it specifies if your car needs an adapter, and where it says to obtain that hardware. Read the date on whatever you find. A statement from two model years ago is history, not guidance.
This step exists because the rollout has been staged and repeatedly revised. Support arrived for different brands at different times, some vehicles needed a software update before they could complete a session, and hardware guidance has been updated after the fact. That churn is exactly why this teardown prints no list: a roster of eligible models is a snapshot that decays, and a decayed snapshot sends someone to a stall that will not serve them. The manufacturer’s own page is the only version that updates when reality does.
Two safety rules attach here and they are not negotiable. Use only hardware your manufacturer supports for your specific vehicle, obtained through the channel it names. Never modify a connector, force a plug that does not seat, or use a cable or adapter with visible damage, cracking, bent pins or heat discoloration. DC fast charging moves serious power through those contacts, and an improvised fit is the one failure mode in this whole procedure that can damage the car, the station or you. If the guidance is unclear, ask the manufacturer directly rather than improvising.
Step 3: Confirm the site in the network’s own app
Compatibility is not only about your car, it is about the specific site. Install the network’s app before your trip, create the account, add a payment method, and confirm it all works while you are sitting at home with good signal. Then, before you commit to a stop, open the app and look up the actual station you plan to use. You are checking three things: that the site is open to your vehicle, that it is showing stalls available, and what the app says about the hardware or flow your car needs there.
Treat the app as the live source and everything else as commentary. Site-level access has been opened progressively rather than uniformly, which means two stations forty miles apart can behave differently on the same day, and a station that worked last spring may have changed. The app is the network’s own record of its own current state, so it is right by construction in a way no article can be. When the app and a forum post disagree, the app wins.
Read the listing rather than the pin, the same discipline our public charger teardown applies to every network. A good listing shows the stall count, the power level, live availability and often notes about the site layout. Favour multi-stall sites, because redundancy is what saves you when one unit is down, and keep a backup station in mind on any leg where arriving with a low battery is the plan. If the app will not confirm the site serves your car, do not route your trip through it.
Step 4: Park for the cable, not for the parking space
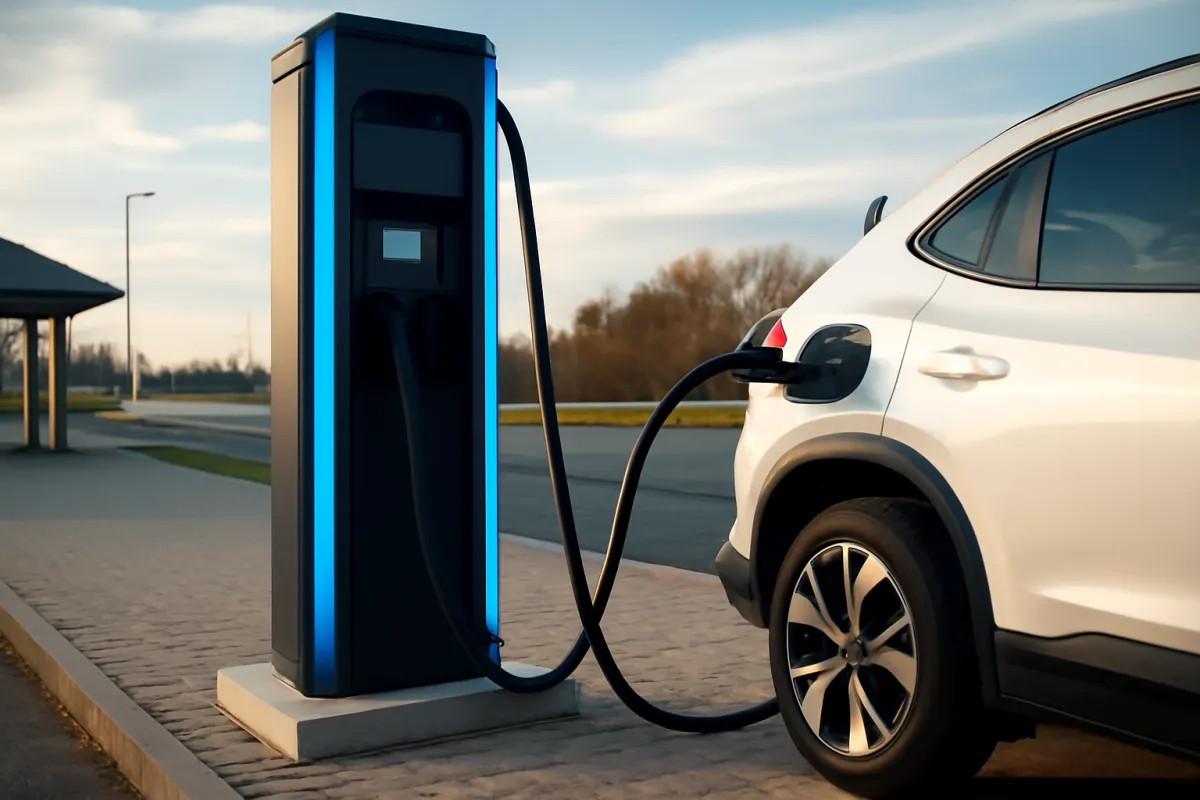
Here is where a non-Tesla session diverges most from the routine you already know. These stalls are pull-in bays with the pedestal at the rear of the space and a deliberately short cable, laid out on the assumption that the charge port sits at the rear driver’s side corner of the car. If yours does, park normally and the connector reaches with slack. If yours sits anywhere else, a normal park can leave you a foot short, and a foot is as good as a mile.
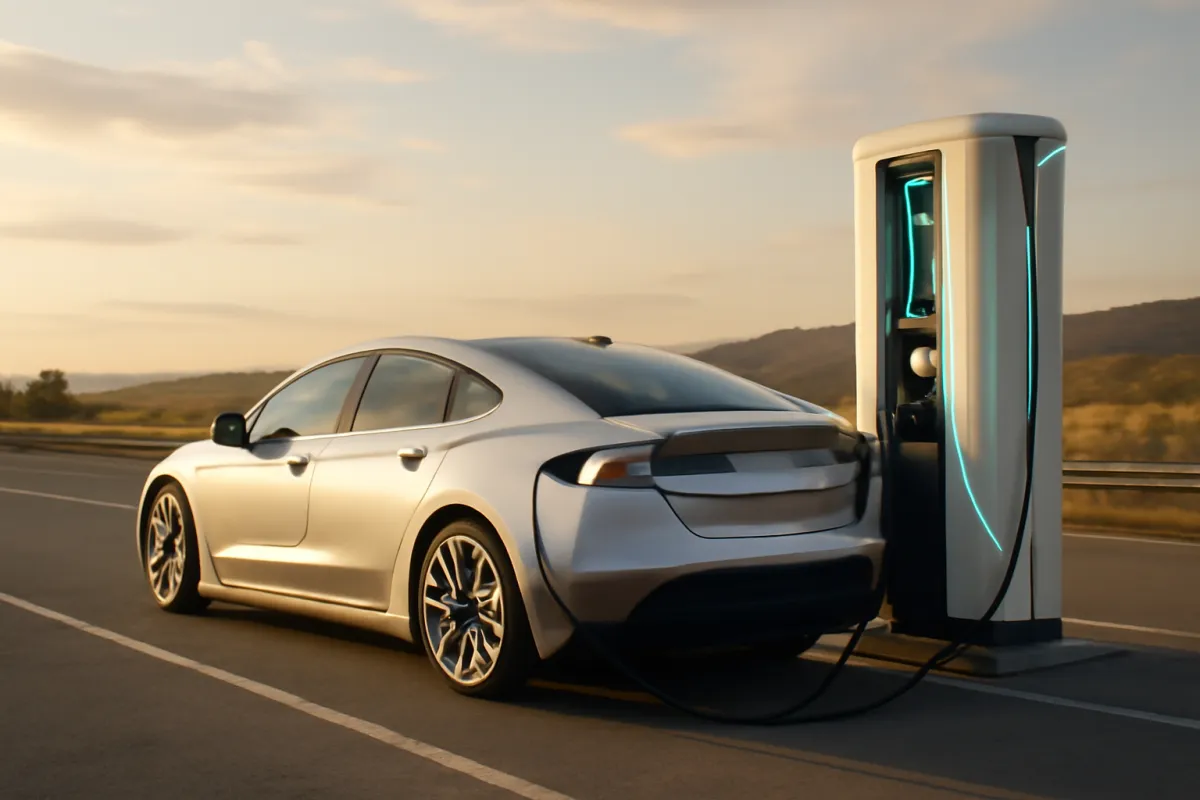
The fixes are physical and quick. If your port is at the rear on the passenger side, backing in or pulling through often puts it within reach. If the port is on a front fender, nose in rather than reversing so the front of the car ends up nearest the pedestal, or angle the car within the bay. If the lot is quiet and the geometry genuinely needs it, taking a bay with an empty neighbour is reasonable; when the lot is busy it is not, and you should look for a site with pull-through stalls or longer cables instead, which some locations have specifically to solve this.
Two things to avoid regardless of geometry. Do not stretch the cable taut across a neighbouring bay: a cable under tension can unseat mid session, it is a trip hazard, and it blocks a driver who has nowhere else to go. And do not let the cable rest across a hitch, a bumper edge or anything that puts a sharp bend in it. Park, then check the reach with the connector still holstered before you commit. Repositioning takes twenty seconds before you plug in and five minutes after.
Step 5: Connect, start the session, and verify the handshake
With the car parked so the cable reaches, the sequence is short. Shift fully to park, since many EVs will not release the charge port door otherwise. Open the port. If your car needs an adapter, fit it to the vehicle inlet first and confirm it is fully home, then bring the station connector to it; if your car has a native port, skip straight to the cable. Lift the connector off its holster, support its weight because a DC connector is heavy, line it up square and push firmly until it seats with a click. Do not twist, lever or force it. If it will not go, the alignment or the fit is wrong, and forcing a connector is how pins bend.
Then start the session, which on this network runs through the account rather than a reader on the pedestal. Open the app, select the site, and select the stall number you are physically plugged into, which is printed on the unit. Start the session and then watch for confirmation from two places: the station or app reporting that power is flowing, and your own car reporting that it is charging with a rising kilowatt figure. Both agreeing is the handshake. One without the other is not a session.
Read the rate the app shows you before you commit, every time. Pricing on this network has been restructured more than once and can vary by site and by hour, so the live figure in front of you is the only one worth acting on, and it is the number to feed into our cost calculator. Above all, do not walk away on the assumption that plugging in equals charging. Coming back in twenty five minutes to a car that never started is the classic first-session setback, and it costs the entire stop.
Step 6: End the session cleanly and clear the stall
Ending is where the small courtesies live. Stop the session first, in the app or on the car, before you touch the cable. The connector locks to the vehicle during charging, so if it will not release, that is the lock doing its job rather than a jam: stop the session, unlock the car, and try again rather than pulling. Once released, draw the connector straight out, remove and stow your adapter if you used one, close the charge port door, and holster the cable on the pedestal so it is not lying where it will be driven over or rained on.
Then move. The taper past roughly 80 percent means the last stretch adds little range for a lot of time, so on a busy site charge to what the next leg needs and go, a habit our charge time teardown puts real numbers behind. If your parking geometry borrowed a neighbouring bay, freeing it promptly is the whole of the etiquette that non-Tesla drivers owe these sites. Check the app shows the session ended and the charge looks right before you drive off, since sorting a billing question with the session fresh is easier than sorting it a week later.
One last habit worth building: note what you learned about that specific site. Whether the cable reached from a normal park, whether the stalls were pull-through, whether the site was busy at that hour. Six of these notes and your regular corridor stops planning itself, which is the same compounding our road trip teardown builds a whole route around.
Why this teardown lists no compatible vehicles
It would be easy to print a table of brands and model years here, and it would get more clicks than the honest alternative. It would also be wrong, and wrong in the specific way that hurts: a driver reads the table in one month, plans a route around it in another, and finds out at the stall that the situation changed. Access to this network by non-Tesla vehicles has expanded in stages, brand by brand and site by site, has occasionally required software updates first, and has been adjusted after the fact. A list is a photograph of a moving thing.
The same applies to hardware. Which adapters a manufacturer supports for which vehicles, and where it says to buy them, has been revised, and using unsupported hardware on a DC connection is a genuine risk rather than a technicality. Naming a product here would be a recommendation this teardown has no current basis to make, so it makes none. Ask the company that warranties your car.
And it applies to pricing hardest of all. Rates on this network vary by site, have been restructured more than once, and have at times differed by account type and by time of day. A number printed on a page is stale the moment the operator changes it, and it would be quoted back at a stall where the screen says something else. The app shows the live rate before you start; that is the number.
None of this leaves you without an answer. It relocates the answer to the two places that are current by definition: the manufacturer for what your vehicle supports, the app for what this site does today. Refusing to invent the rest is the point of this teardown rather than a hole in it.
Native port or adapter: what actually changes
The practical difference between a car with a native matching port and a car that needs an adapter is smaller than drivers expect, but it is real, and it shows up in three places. The first is the connect step: an adapter adds one component and one more chance for something to be seated imperfectly, so it adds a few seconds and one more thing to verify. The second is carrying: an adapter is an object you have to actually have with you, and the classic failure is leaving it at home on the one trip that needed it. Keep it in the car permanently rather than moving it around.
The third is condition. An adapter is a wear item that lives in a door pocket and gets dropped. Inspect it before each use for cracked housing, bent or discoloured pins, or debris in the contacts, and retire it if anything looks wrong instead of trying one more session. The same inspection applies to the station cable itself: if the connector on the pedestal looks damaged, use a different stall and report it.
Everything else is identical. The session flow, the app, the account, the parking geometry and the troubleshooting order do not change based on which population your car belongs to. A native port removes a component from the chain; it does not remove a step from the procedure. Drivers with native ports still have to check the site in the app, still have to park for the cable, and still have to verify the handshake before walking away.
What an adapter does, and what it does not do
Worth being precise, because a lot of confusion at stalls comes from expecting too much of a small object. A charging adapter is a passive mechanical and electrical bridge: it presents one connector shape to the station and a different one to the car, and it passes through the communication lines the two use to negotiate a session. It does not convert power levels, it does not raise your vehicle’s accept rate, and it does not grant access to a network that has not opened to your car.
That last point resolves the most common misunderstanding. If a site does not serve your vehicle, an adapter that physically fits will not change the answer, because the gate is in the network’s account and vehicle handling rather than in the plug shape. Physical fit and permission are separate questions, which is why step two and step three are separate steps.
An adapter also does not make a session faster. Your charging speed is set by the lower of the stall’s capability and your vehicle’s accept rate, further limited by battery temperature and state of charge. If your car peaks well below the stall’s rating, that is your car’s number and no hardware in the middle changes it. Understanding that in advance prevents the disappointment of watching an unfamiliar network deliver exactly what your own car was always going to take, and it is the same ceiling our public charger teardown describes on every other network.
Illustrative minutes lost to each unchecked unknown
The cost of skipping the preparation is measured in minutes at the stall, and it is worth seeing them ranked. Every figure below is illustrative, meant to show relative weight rather than to predict your stop, but the ordering is the durable part: the biggest losses come from things you could have settled at home.
Illustrative minutes added to a first session by each unchecked unknown
Relative time cost of arriving without having settled something in advance. Illustrative only; the ranking is the lesson, not the numbers.
Widths are each value against the 15 minute maximum. The two longest bars are the two things step two and step three exist to remove, and both are free to settle at home.
Read the chart as a preparation argument rather than a schedule. The top two bars are pure avoidable overhead: driving to a second site because the first would not serve your car, and building an account while standing in the cold. Both vanish entirely if you check the manufacturer and the app before you leave. The bottom three are smaller and partly unavoidable, but rehearsing the connect sequence once in your driveway shrinks them too. The companion on this page lets you set your own overhead figure and see what it does to the length of the stop.
Stall geometry and why the cable is short
Cables at DC fast charging sites are short for good reasons rather than mean ones. A DC cable carrying serious current is thick, heavy and expensive, and every extra foot adds weight a driver has to lift, resistance in the run, and cost per stall. Some sites use liquid cooled cables to keep the gauge manageable at high power, which makes them lighter to handle but no longer. So the operator sizes the cable to the shortest run that serves the layout it designed for, and this network designed for a rear driver’s side port.
That is the whole of the non-Tesla geometry problem. Your car is a different shape than the one the bay was drawn around. The variables that matter are which corner the port sits on, how long the car is, and whether the bay is pull-in or pull-through. A long vehicle with a nose port in a pull-in bay is the hardest combination, and a short vehicle with a left rear port is the easiest.
Three tactics cover almost every case. Back into the bay when the port is at the rear on the wrong side, which usually swaps the corners in your favour. Nose in when the port is at the front. And prefer sites the app flags as pull-through or as having longer cables when you know your geometry is awkward, because operators have been adding those specifically to widen the range of cars a site can serve. None of this requires stretching anything. If the connector does not reach without tension, the answer is to reposition, never to pull the cable taut.
A worked example: one 33 minute session
Tie the six steps together with a single stop. Say you drive an EV with a 60 kilowatt-hour usable battery, you arrive at 20 percent, and you want 80 percent to comfortably reach the next stop. In your driveway a week earlier you completed steps one and two: you looked at your inlet, read your manufacturer’s current statement, and settled whether you need hardware, which now lives permanently in the boot. You created the network account at home and added a card.
At the stop, step three took thirty seconds in the app: the site is open to your car, four stalls, two free. Step four took about a minute and a half, including one reposition because your port sits at the front fender and you initially pulled in the ordinary way. Step five took roughly two minutes: fit the hardware if you use it, seat the connector, select the stall number, start the session, read the live rate, and wait until both the app and the car report power flowing.
Then the physics. Going from 20 to 80 percent on a 60 kilowatt-hour battery is about 36 kilowatt-hours. At an illustrative 110 kilowatt average across the session, allowing for the taper as you climb, that is roughly 20 minutes of charging, worth about 120 miles of range at an illustrative 0.30 kilowatt-hours per mile. Step six, stopping the session, stowing the hardware, holstering the cable and pulling out, takes another two to three minutes. Total stop: about 33 minutes, of which roughly 20 is the car charging and roughly 13 is you. Every one of those figures is illustrative, so run your own battery, target and stall power through the companion to see your version.
Where the minutes go in a first session
The worked example splits into two very different kinds of minute, and seeing the split is what makes the preparation feel worthwhile. Below is that same 33 minute stop as shares of the whole.
Where the minutes go in an illustrative 33 minute first session
Shares of the worked example above, from arriving at the site to pulling out of the bay.
Illustrative shares summing to 100 percent of a 33 minute stop: about 20 minutes of charging and about 13 minutes of human overhead across the four other slices.
The shape carries the argument. Charging dominates and you spend it elsewhere, so the only minutes you can actually win back are the four small slices, and every one of them shrinks with practice or preparation. On a second visit to the same site the confirm and park slices nearly vanish because you already know the layout and the account is live, which is why a stop that felt fiddly the first time takes barely longer than a fuel stop by the third. The failures that blow this chart up are the ones from the previous chart: an unserved site, an account built at the stall, a handshake that will not complete.
Account and payment setup versus a CCS network
If your public charging habits were built on CCS networks, the account model is the part that will feel different, and it is worth understanding the difference rather than being surprised by it. On many CCS networks the stall itself is a payment terminal: there is a contactless reader on the unit, a printed code you can scan, and often a guest flow that lets a driver charge with no account at all. Walk-up strangers can use those stations, which is exactly what they were designed for.
The Tesla network grew from a different assumption. It was built as a closed loop around vehicles that identify themselves, so historically the authentication and billing live in the account and the app rather than on the pedestal, and opening the network to other cars extended that model rather than replacing it. The practical consequence for you is simple: the setup work moves earlier. There is nothing to tap at the stall, so an account that is not ready before you arrive is an account you build in the cold.
Do not take that as a permanent description. The network is free to change how sessions start, including at individual sites, and it has evolved this model over time. So confirm in the app what flow applies to your car at the site you are heading to rather than assuming what worked last year still applies. The durable advice is not which app to open, it is to have the account, the payment method and the app tested at home so that whatever the flow turns out to be, you are not creating credentials at 8 percent. Our public charger teardown covers the tap and scan flows you will still meet elsewhere.
Compatibility is four separate gates, not one
Most confused questions about non-Tesla charging collapse four separate conditions into one word. Pulling them apart makes it obvious what to check and in what order, and it explains why two drivers with the same car can have opposite experiences at different sites.
- The physical gate. Does the connector fit your inlet, directly or through hardware your manufacturer supports? This is settled by looking at your car, once, forever.
- The vehicle gate. Does your specific model and model year support charging on this network, and does it need a software update first? Only the manufacturer’s current statement answers this.
- The site gate. Is this particular station open to your vehicle right now? Only the network’s app answers this, and the answer can differ between two stations on the same road.
- The account gate. Do you have a working account and payment method that the site will accept for your session? This is settled at home and checked before you leave.
All four must be open for a session to happen, and they fail in different ways. A physical mismatch is obvious at the stall. A vehicle gate failure often looks like a session that starts and then stops. A site gate failure usually shows in the app before you drive. An account failure looks exactly like a hardware fault, which is why it sits in the troubleshooting order below. Anyone who tells you compatibility is a yes or no has merged four questions that behave independently.
When the session will not start: a fixed order
A failed start is common enough on any network that it deserves a rehearsed response rather than improvisation. Work these in order, and stop when power flows.
First, reseat the connector. A plug that is not fully home is the single most frequent cause and costs nothing to eliminate. Unplug, check the inlet and the connector face for debris or ice, line it up square and push firmly until it clicks. If you use an adapter, check that it is fully seated on both faces, since a half seated adapter fails exactly like a half seated cable.
Second, check the stall number. Selecting the wrong stall in the app is easy at a site where the numbering is not where you expect, and it produces the identical symptom of a plugged in car that never starts. Read the number physically printed on the unit you are connected to and match it in the app.
Third, check payment. An expired card, a declined transaction or an account that needs re-authentication looks like a hardware fault from the driver’s seat. Open the account, confirm the payment method is valid, and retry. Fourth, move stalls. Trying a neighbouring unit is faster than diagnosing the one in front of you, and it separates a broken stall from a broken setup immediately.
Only after those four should you call the network’s support number, which is printed on the unit. And if your own car is displaying a charging fault or a warning of its own, stop and take it to the manufacturer rather than trying more stalls. A vehicle reporting a fault is a different problem than a station reporting one, and our running out of charge teardown covers what to do if the battery gets genuinely low while you sort it out.
What caps your charging speed on an unfamiliar stall
Drivers often expect an unfamiliar network to charge differently, and are then unsure whether a modest rate means something is wrong. Usually it means nothing is wrong. Four ordinary ceilings set your speed and none of them are network specific.
Your vehicle’s accept rate is the first and hardest. You receive the lower of what the stall can deliver and what your car will take, so a car that peaks well below the stall’s rating sees its own number no matter how capable the hardware is. The second is state of charge: every EV tapers as the battery fills, gently at first and then sharply above roughly 80 percent, which is why the last stretch to full can take as long as everything before it and why the standard move is to stop at your target and drive on.
The third is battery temperature. A cold pack accepts power slowly until it warms, which can turn an expected fifteen minute stop into a much longer one on a winter morning. Preconditioning the battery on the drive in is the fix, and our preconditioning teardown covers how and when, while our cold weather teardown covers what the cold costs you more broadly. The fourth is the stall itself, since sites built at different times run at different power levels and shared cabinets can split power between neighbouring stalls.
Judge the session by what your car reports rather than what the pedestal advertises. If the car reports a rate consistent with its own peak, a warm pack and your state of charge, the session is healthy even if the number looks unremarkable.
Common mistakes on a first session
The failures here are rarely electrical. They are preparation skipped, and each has an obvious fix.
- Trusting a published compatibility list. Any roster of eligible cars, supported hardware or rates decays. Check your manufacturer and the network’s app, in that order, before every trip that depends on it.
- Building the account at the stall. This is the single largest avoidable time cost. Install the app, create the account, add payment and confirm it works at home.
- Leaving required hardware behind. If your car needs an adapter, keep it in the vehicle permanently rather than in a drawer, and inspect it before each use.
- Parking as if the bay were built for your car. Check the cable reaches before you plug in, reposition if it does not, and never stretch the cable taut across a neighbouring bay.
- Walking away before the handshake confirms. Wait until both the app and the car report power flowing. A plugged in car that never authenticated charges nothing.
- Charging to 100 percent on a busy site. The taper past roughly 80 percent adds little range for a lot of the queue’s time. Take what the next leg needs and move.
- Forcing a connector that will not seat. If it resists, the alignment or the fit is wrong. Forcing bends pins and damages both sides.
Safety limits at the stall
Short list, no exceptions, because DC fast charging moves real power through small contacts. Use only hardware your vehicle manufacturer supports for your specific vehicle, obtained through the channel it names. Do not modify a connector, an adapter or an inlet in any way, and do not use anything improvised to bridge a shape that does not fit. If a connector will not seat with firm, square pressure, stop and check the alignment rather than applying more force.
Inspect before you connect. A station cable with a cracked housing, exposed conductor, bent or discoloured pins, or visible heat damage should not be used: pick another stall and report it in the app. The same test applies to your own adapter, and a damaged one is retired rather than nursed. Keep the inlet and connector faces free of debris, ice and standing water, and dry the connector face if it has been dropped in a puddle.
During the session, leave the connector locked and do not attempt to pull it out under load. Stop the session first, always. If you smell burning, see smoke, hear arcing or notice the connector or cable becoming unusually hot, stop the session from the app or the car if you safely can, stay clear of the equipment, and contact the network using the number on the unit. And if your vehicle displays a charging fault of its own, that is a conversation with the manufacturer rather than a reason to try a fifth stall.
Keeping your own information current
Because the durable facts here are procedural and the volatile ones are not, the maintenance job is small but real. Once a season, and before any trip that depends on fast charging, do three quick checks. Open your manufacturer’s owner site and re-read its current charging statement, since support and hardware guidance have both been revised after initial publication. Open the network’s app and confirm your account and payment method are still valid, because an expired card discovered at a stall is a wasted stop.
Then check your vehicle software. Some vehicles required an update before they could complete sessions on this network, and pending updates are easy to ignore for months. Installing them in your driveway on your own wifi is free; discovering one is needed at a stall is not.
Finally, keep your own site notes. The app tells you a station’s current status, but only you know that the third stall from the end is the one where your cable reaches without repositioning. That kind of local knowledge is what makes a corridor stop routine, and it is exactly the sort of thing our road trip teardown turns into a plan. Nothing on this page needs revisiting; the four volatile facts do, and the checks take five minutes.
The non-Tesla session checklist
The whole procedure in the order it happens.
- Identify your inlet and its position on the car. Photograph the open port and note which corner it sits on and roughly how far from the rear.
- Read your manufacturer’s current guidance. Model support, any required software update, and what hardware it specifies. Check the date on what you read.
- Obtain any required hardware through the channel your manufacturer names. Keep it in the car and inspect it before each use.
- Install the app, create the account, add payment, and test it at home. This is the largest single time saving available.
- Confirm the specific site in the app before you commit. Open to your car, stalls free, and a backup site in mind on a critical leg.
- Park for the cable. Check the reach before plugging in, back in or nose in as your port position demands, and never stretch the cable taut.
- Connect square and firm, select the correct stall number, and start the session. Read the live rate before you commit.
- Verify the handshake in two places before you walk away: the app or station reporting power flowing, and the car agreeing.
- Charge to what the next leg needs, usually stopping near 80 percent on a busy site rather than pushing through the taper.
- Stop the session, stow the hardware, holster the cable, and clear the bay promptly, especially if your geometry borrowed the neighbouring space.
The bottom line
Charging a non-Tesla at a Tesla Supercharger is a six step routine, and only two of the steps are unusual. Identify your inlet and where it sits, read your manufacturer’s current guidance, confirm the specific site in the network’s app, park for the cable rather than for the parking space, connect and verify the handshake in two places, then end the session and clear the bay. The two that catch people out are the parking geometry, because these bays were drawn around a rear driver’s side port, and the account setup, because the authentication lives in an app rather than on the pedestal.
What this teardown will not do is tell you which cars are eligible, which hardware is approved, or what a session costs, because all three have changed repeatedly and any answer printed here would eventually be a confident lie. Your manufacturer and the network’s own app are the only sources current enough to plan around, and checking both takes less time than one wasted detour. Every figure above is illustrative, so run your own battery, target and stall power through the companion, price the energy in our calculator once the app shows you a rate, and lean on our Tesla charging cost teardown and public charging cost teardown for the money side of the same stop.
This teardown is educational and independent. AmpLoft has no affiliation with any automaker or charging operator, and nothing here is an endorsement of any product or network. Access rules, eligible vehicles, supported hardware and pricing on the network described above have changed repeatedly and can change again without notice, so no compatibility list, adapter recommendation or rate appears in this piece by design: your vehicle manufacturer and the network’s own app are the only current sources, and both should be checked before you rely on a station. Every time, power figure, energy amount and range number above is illustrative and shifts with your vehicle, its accept rate, battery temperature, state of charge and the individual site.
Frequently asked questions
Can any non-Tesla EV use a Tesla Supercharger?
Not automatically, and the answer moves. Access to that network has been opened in stages, vehicle by vehicle and site by site, and the list of who can plug in where has changed repeatedly since the first non-Tesla sessions. That is why this teardown deliberately does not print a roster of eligible cars: any list would be wrong within months, and a wrong list is worse than none when you are sitting at 8 percent. The two sources that are current by definition are your vehicle manufacturer, which states what your specific model supports and what hardware it needs, and the charging network's own app, which shows whether a given site accepts your car right now. Check both before you route a trip through one of these stations.
Do I need an adapter, or does my car already have the right port?
It depends on which port your car was built with, and you can settle it in a minute by looking. Newer vehicles increasingly ship with a native connector that matches the network's own hardware, in which case the cable plugs straight in with nothing in between. Vehicles built with the older fast-charging standard need a physical adapter to bridge the two shapes, and that adapter has to be one your manufacturer supports for your model. This teardown does not name adapter products or state which ones are approved, because approvals and availability change and getting it wrong risks both the car and the station. Ask the manufacturer what your specific vehicle needs, and buy only through the channel it points you to.
How is starting a session different from a CCS charging network?
The mechanics of authenticating differ more than the charging itself. On many CCS networks you can walk up and tap a contactless card at the stall or scan a code printed on the unit. On the Tesla network the flow historically runs through an account and an app rather than a card reader on the pedestal, which means the setup work happens before you arrive, not at the stall. That difference is the single biggest cause of a slow first session: a driver who has never opened the app spends ten or fifteen minutes creating an account and adding a payment method while the queue builds. Do that setup at home. Confirm in the app which flow your car and that site actually use, since these details are the network's to change.
Why does the stall layout matter so much for a non-Tesla?
Because the cable is short and the stalls were laid out for one charge port position. Tesla stalls are typically pull-in bays with the pedestal at the rear of the space, sized so that a car whose port sits at the left rear corner can park normally and still reach. If your port is at the front fender, the right rear, or the nose, a normal park can leave the connector a foot short. The fixes are simple and physical: park nose out, straddle nothing, and take a stall that has an empty neighbour if the geometry needs the extra room. Some sites have longer cables or pull-through bays specifically to help. The app listing and a look at the lot when you arrive tell you which kind you are at.
What do I do if the session refuses to start?
Work a fixed order rather than guessing. First reseat the connector, since a plug that is not fully home is the most common failure and costs nothing to rule out. Second, confirm in the app that the session was actually initiated against the stall number you are plugged into, because selecting the wrong stall number is easy and produces exactly the same symptom. Third, check the payment method on the account, since a declined or expired card looks identical to a hardware fault. Fourth, move to a different stall, which is faster than diagnosing one unit. Only after those four should you call the network's support line, and if the car itself is reporting a charging fault, stop and take that up with the manufacturer instead.
Will my car charge as fast at a Supercharger as a Tesla does?
Probably not identically, and the reasons are ordinary rather than punitive. Your peak charging rate is the lower of what the stall can deliver and what your vehicle will accept, and accept rates differ widely by model. Battery temperature matters just as much: a cold pack takes power slowly until it warms, which is why preconditioning on the drive in makes a measurable difference. State of charge matters too, since every EV tapers hard above roughly 80 percent. Older stalls at some sites also run at lower power than newer ones. Read the number your car reports rather than the number on the pedestal, and treat any published peak as a ceiling you may never touch.
How much does it cost to charge a non-Tesla at a Supercharger?
This teardown will not quote a rate, and you should distrust any page that does. Pricing on that network has been restructured more than once, varies by site and by time of day, and has at times differed between account types, so a number printed here would mislead you at the moment you relied on it. The app shows the live rate for the specific stall before you commit, which is the only figure that is true for your session. What is durable is the arithmetic: energy added times the rate, plus any time-based fees. Our teardowns on the cost of charging a Tesla and the cost of public charging explain how those structures work so you can price your own session once you read the live number.
Is it rude for a non-Tesla to use these stalls?
No, when the network has opened the site to your car it is a public charging station like any other, and the etiquette is the same everywhere. Charge to what the next leg needs rather than to full, since the taper past roughly 80 percent adds little range for a lot of the queue's time. Do not occupy two stalls to make the cable reach if the lot is busy, and if your geometry genuinely needs the neighbouring space, take it when the site is quiet and move when it is not. Move the car promptly once the session ends. The only real friction non-Tesla drivers create is the parking geometry, which is why steps four and six of this teardown spend so long on it.