What's in this teardown
- Before you start: what home charging really asks of you
- Step 1: Understand the three charging levels
- Step 2: Assess your electrical panel and capacity
- Step 3: Choose a charger and the right amperage
- Step 4: Hire a licensed electrician and pull the permit
- Step 5: Install and mount the charger
- Step 6: Set up scheduling and off-peak charging
- Step 7: Maintain the setup and troubleshoot problems
- Illustrative monthly home-charging cost by miles
- Where EV owners actually charge
- Home charging versus the alternatives
- A worked example: charging one EV at home
- Common mistakes to avoid
- Troubleshooting: slow charges, tripped breakers, and no garage
- The home-charging checklist
- The bottom line
Short answer: You can charge an EV at home today by plugging into a standard outlet, which adds an illustrative 3 to 5 miles of range per hour and covers low-mileage drivers. Most owners add a 240 volt Level 2 wall charger, roughly 20 to 40 miles per hour, installed by a licensed electrician, then enroll in a time-of-use rate and schedule charging overnight. Home charging costs about 4 to 5 cents per mile.
The quiet magic of an electric car is that its fuel pump can live in your driveway, filling the tank while you sleep, at the cheapest rate your utility sells. Our EV ownership math leaned on home charging as the economic engine of the whole proposition, and this teardown is the operating manual for that engine: seven ordered steps that take you from “how does charging at home even work” to a car that leaves every morning full, on an off-peak rate, with almost none of your attention.
Read it as the complete home-charging picture, not just a hardware project. The install of a wall unit is one step here, and our charger-install teardown covers that project in its own right; this article is the wider practice, which starts before any install (you can charge at home today, with nothing bought) and continues long after it (scheduling, apps, and upkeep are where the savings actually accrue). For what the electricity itself costs once it is flowing, see our home charging cost teardown, and for how long a session really takes, our charge-time breakdown.
Key takeaways
- You can charge at home today with zero installation: Level 1 from a standard outlet adds an illustrative 3 to 5 miles per hour and genuinely covers low-mileage drivers.
- Most owners add a Level 2 wall charger (240 volt, roughly 20 to 40 miles per hour) once their driving outgrows Level 1, and that install is the only step needing a licensed electrician.
- Cost is small and predictable: illustratively about 4 to 5 cents per mile at a 15 cent home rate, near $45 a month for 1,000 miles, and closer to $24 on an off-peak plan.
- The biggest saving is a schedule, not a bigger charger: enroll in a time-of-use or EV rate plan and set charging to the overnight off-peak window once.
- Size the amperage to your driving and your panel, keep the connector clean and dry, and Level 2 hardware quietly outlasts the car.
Before you start: what home charging really asks of you
Home charging asks for surprisingly little, and knowing the short list up front keeps you from over-buying. Gather three things before step one. First, a rough count of your daily driving miles, because that single number decides whether Level 1 already suffices or a Level 2 install earns its keep; a two-week log beats a guess. Second, your car’s onboard AC charging limit, the spec-sheet figure that caps how fast the vehicle accepts alternating-current charging no matter how large the wall unit is, commonly somewhere between 7.7 and 11.5 kilowatts; buying wall-unit amperage above it spends money on a ceiling the car ignores. Third, honest access to your electrical panel and your real parking spot, since the distance between the two is the biggest cost variable if you go Level 2.
Two more inputs sharpen the plan. Check your utility’s website for time-of-use or EV-specific rate plans and any charger or wiring rebates, because those change both the running cost and the install budget. And decide, honestly, how patient you are: a genuine Level 1 driver can start tonight for free, while a Level 2 setup is a one-to-two-week arc of quotes, permitting, and a single install day. Difficulty for the homeowner is low throughout, it is choices and paperwork; the one part that is not a homeowner job is the 240 volt wiring, which a licensed electrician performs under permit. Run the numbers as you read with our calculator.
Step 1: Understand the three charging levels
Start with the vocabulary, because every later decision descends from it, and it is simpler than it sounds. There are three charging levels, and only two of them live in a house. Level 1 is the portable cord most EVs include, plugged into an ordinary grounded 120 volt household outlet, drawing roughly 1.4 kilowatts and adding an illustrative 3 to 5 miles of range per hour, about 35 to 50 miles over a long overnight session, at an installation cost of exactly zero. Level 2 is a 240 volt circuit, the same voltage your electric dryer uses, feeding a wall unit at anywhere from about 7 to 11.5 kilowatts and adding roughly 20 to 40 miles per hour, enough to refill nearly any battery from nearly empty overnight.
Level 3, DC fast charging, is the third level, and the important thing to know is that it does not belong at home: it needs industrial power that residential service cannot supply, so it lives at public stations for road trips. We audited its per-mile cost in our public charging teardown, and the short version is that everyday fast charging quietly erases the savings home charging exists to capture.
Now apply the only test that matters for home. Take the hours your car sits parked at home overnight, multiply by a level’s miles-per-hour, and ask whether the result covers your daily miles with margin. A driver averaging 30 to 40 daily miles with reliable overnight parking is often served entirely by Level 1, spending nothing on hardware. The caveat: decide honestly, because this choice sizes every step after it. Overspecifying here is how people pay for a 60 amp circuit their commute never uses. See how long charging really takes before you conclude you need more than an outlet.
Step 2: Assess your electrical panel and capacity
If step one points you toward Level 2, the next question lives in one metal box, so open it before you shop. A Level 2 charger is among the largest loads in a house and runs continuously for hours, which electrical code treats specially: continuous loads are sized with a safety margin, so a 48 amp charger wants a 60 amp circuit and a 40 amp charger a 50 amp one. Your panel must supply that circuit twice over, physically (open slots for a double-pole breaker) and in capacity (enough headroom in the service rating above everything else the house draws at once). Level 1 charging skips this step entirely, since it uses a circuit you already have.
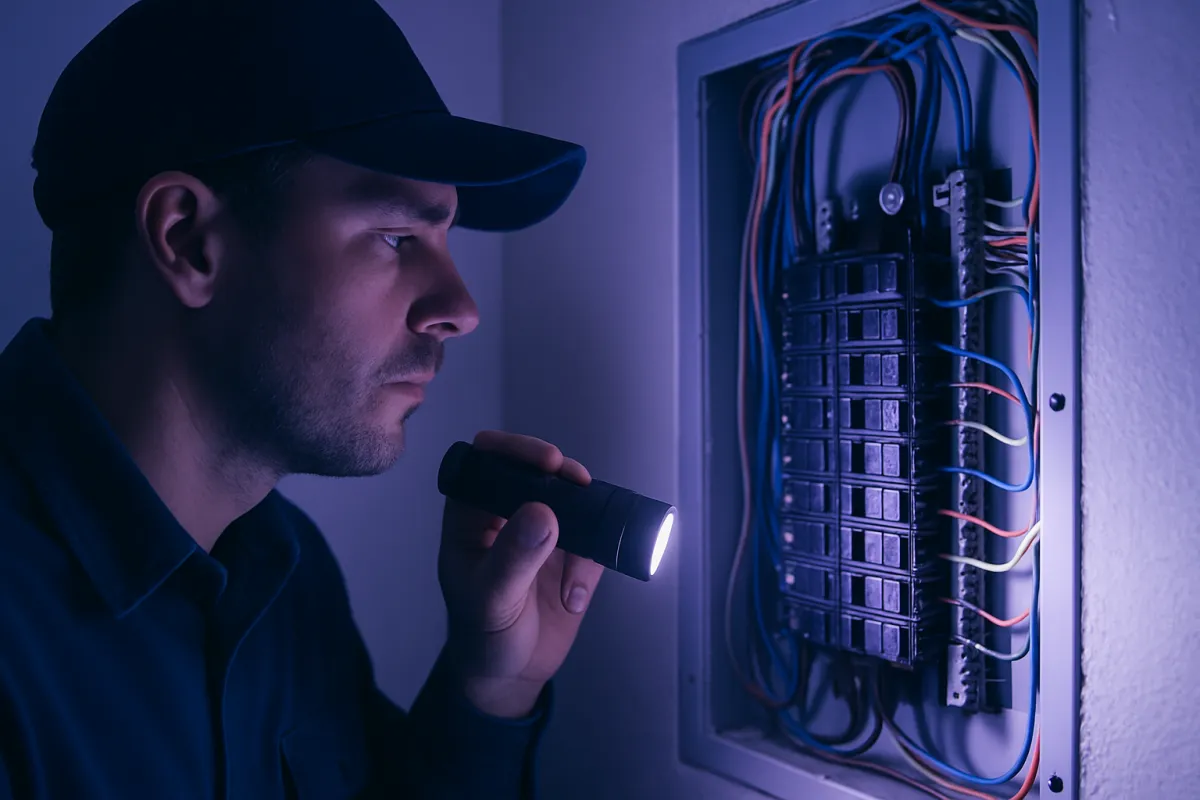
An electrician answers the capacity question with a load calculation, a standardized worksheet of your home’s demands run in minutes, and it is the single most valuable thing to buy before any hardware. Typical outcomes: a 200 amp service without electric heating usually hosts a full-size charger easily, while an older 100 amp service already feeding an electric range, dryer, and heat may have no honest room. When capacity is tight, the modern escape hatches matter, because a panel upgrade costing an illustrative $2,000 to $4,000 or more is no longer automatic. A smaller charger on a smaller circuit often refills overnight identically, and a load-management device that pauses the charger while the dryer or range runs lets a big charger legally share capacity a static calculation would deny. The caveat: do not eyeball this or trust a spec-sheet promise, because a load calculation is cheap insurance against discovering mid-install that the real project was your panel all along.
Step 3: Choose a charger and the right amperage
With the panel’s ceiling known, shop the wall unit against it, not against the marketing. Charger sellers push amps the way truck ads push towing, and the same skepticism applies. The lineup runs from portable 16 amp units through the common 32, 40, and 48 amp wall units to 80 amp flagships, translating to roughly 12, 25, 30, 35, and 50-plus miles of range per hour before the car’s onboard limit truncates the top for many models. Apply the overnight test again: at 40 amps, about 30 miles per hour, an eight-hour night restores 240 miles, effectively any battery from any realistic daily state. The 80 amp unit finishing at 2 a.m. instead of 5 a.m. changes nothing about your morning while demanding a 100 amp circuit few panels can spare.
Next, decide hardwired or plug-in. Hardwiring lands the conductors directly in the unit: it supports higher amperages, removes a connection point that can loosen and heat, and satisfies outdoor-rating rules. Plug-in uses a heavy 240 volt NEMA 14-50 receptacle and buys portability (take the unit when you move) and easy replacement. If you plug in, one component outranks the charger brand: the receptacle. Continuous 40 amp draw for hours is the harshest duty a residential receptacle sees, and budget units have a documented record of overheating, so specify an industrial-grade receptacle and say “EV duty” out loud when quoting.
On smart features, pay for the earners and shrug at the rest. Scheduling, energy metering, and load management touch your rate schedule or your panel math and pay for themselves; voice hooks and status lights do not. Buy the smallest amperage the car and panel can honestly use, and put the savings toward the wire run. Illustrative hardware budget: the wall unit itself commonly runs $300 to $700, with the connector and cable quality mattering more than the app. A branded unit such as a Tesla home charger can be a tidy match for that make, but a good third-party charger on the right circuit does the same job, so choose on connector fit and amperage rather than the logo.
Step 4: Hire a licensed electrician and pull the permit
This is the step you do not skip and do not DIY, and it is worth being blunt about why. A new 240 volt circuit for a large continuous load is squarely permit territory in most jurisdictions, and the permit exists because the inspection catches the wire-gauge, breaker-sizing, and grounding errors that quietly turn into heat behind a wall. The permit fee is small against the electrician’s labor, the electrician typically files it, and the downside of skipping is asymmetric: an unpermitted circuit implicated in a fire is both a safety failure and an insurance argument you never want to have. Our install teardown covers the hiring and permitting in full project depth.
Hire a licensed electrician for the wiring, full stop. This teardown equips you to plan and to charge, not to perform high-voltage work. The homeowner’s role is the spec (amperage, location, hardwired or industrial-grade receptacle), the quotes, the permit question asked out loud, and the load calculation insisted upon. The electrician’s role is everything with voltage in it, because this work sits on decades of fire-safety code that a licensed pro reads as routine and a first-timer does not.
Get two or three quotes on one identical written spec, because labor pricing for the same job varies widely and a vague spec invites scope inflation. Confirm the electrician is licensed and insured, that they pull the permit, and that the quote names the receptacle grade if you went plug-in. The caveat: cheapest is not the goal, code-correct and inspected is. And before you sign, sweep for utility rebates, tax credits, and EV rate plans, which routinely return several hundred dollars and occasionally most of the project cost; confirm each one with your utility and tax jurisdiction rather than assuming it applies.
Step 5: Install and mount the charger
Install day is quieter than a dishwasher delivery, which is the point of every planning step before it. A typical single-day job runs: main power handled safely, a new double-pole breaker landed, the cable pulled from panel to charger location (through basement or attic where easy, in surface conduit where not, the hours-long middle of the day and the reason distance dominated the quote), the receptacle or hardwire connection made at the wall, and the unit mounted and torqued to spec, because loose lugs under continuous load are precisely the failure the torque check prevents. Then power on, a commissioning charge with your car or a test load, and the paperwork for inspection.
Mounting position is the part worth your input. Fix the unit where its cable reaches the car’s charge port in your normal parking position with slack to spare, remembering that a future car may wear its port on the opposite side, and a spot visible from the driver’s seat is a bonus, since a glowing connector you can see is a charge you never forget to start. If you have no garage, an outdoor-rated unit on a weatherproof circuit covers a driveway or carport perfectly well; the hardware is built for it.
Your part on install day is small and front-loaded: clear the wall and the cable route the day before, have the car home for commissioning if you can, ask for the torque check and the receptacle grade by name if you went plug-in (good electricians smile at informed clients), and photograph the open-wall work before any patching, a habit that pays at resale and every future project. Do not skip the inspection: schedule it, be present if required, and file the signed permit with the house documents. The caveat: a mount is permanent, so measure the cable reach twice before the electrician drills.
Step 6: Set up scheduling and off-peak charging
Here is where the savings actually begin, and it is the step most guides underplay. A charger that charges the instant you plug in is leaving money on the table, because grid electricity is cheapest overnight and many utilities price it accordingly. Enroll in your utility’s time-of-use or EV-specific rate plan if the overnight math wins (it usually does for EV households), then set the charging schedule once, in the car’s app or the charger’s, so current flows only inside the off-peak window from night one. You plug in at 6 p.m. out of habit; the car waits and starts at 11 p.m. on its own.
The arithmetic is worth seeing once. Illustratively, 1,000 miles a month at 30 kWh per 100 miles is 300 kWh: about $45 at a 15 cent flat rate, about $24 at an 8 cent overnight rate, a roughly $250-a-year difference for ten minutes of enrollment and a schedule set a single time. Set it in whichever place is more reliable for your car, the vehicle’s own schedule or the charger’s, but not both at once, since dueling schedules are a common reason a car mysteriously does not charge. Two more setup wins: turn on preconditioning so the car warms or cools its cabin from the wall rather than the battery before you leave, and set a charge limit near 80 percent for daily use, topping to full only before a long trip, a habit our battery-life teardown explains pays off over years. See our monthly cost teardown for where this line sits in the whole budget.
Step 7: Maintain the setup and troubleshoot problems
Home charging hardware is close to maintenance-free, which is part of its appeal, but a few habits keep it that way for the life of the car. Keep the connector clean and dry, seat it fully until it clicks, and inspect the cable a few times a year for cuts, cracks, or a plug that feels warm to the touch after a session, because warmth at the plug is the one symptom worth acting on rather than watching. Coil the cable loosely rather than kinking it in the same spot, and if the unit lives outdoors, glance at the enclosure seals seasonally. None of this takes more than a minute, and it is the difference between hardware that quietly outlasts the car and a connector that fails in year six.
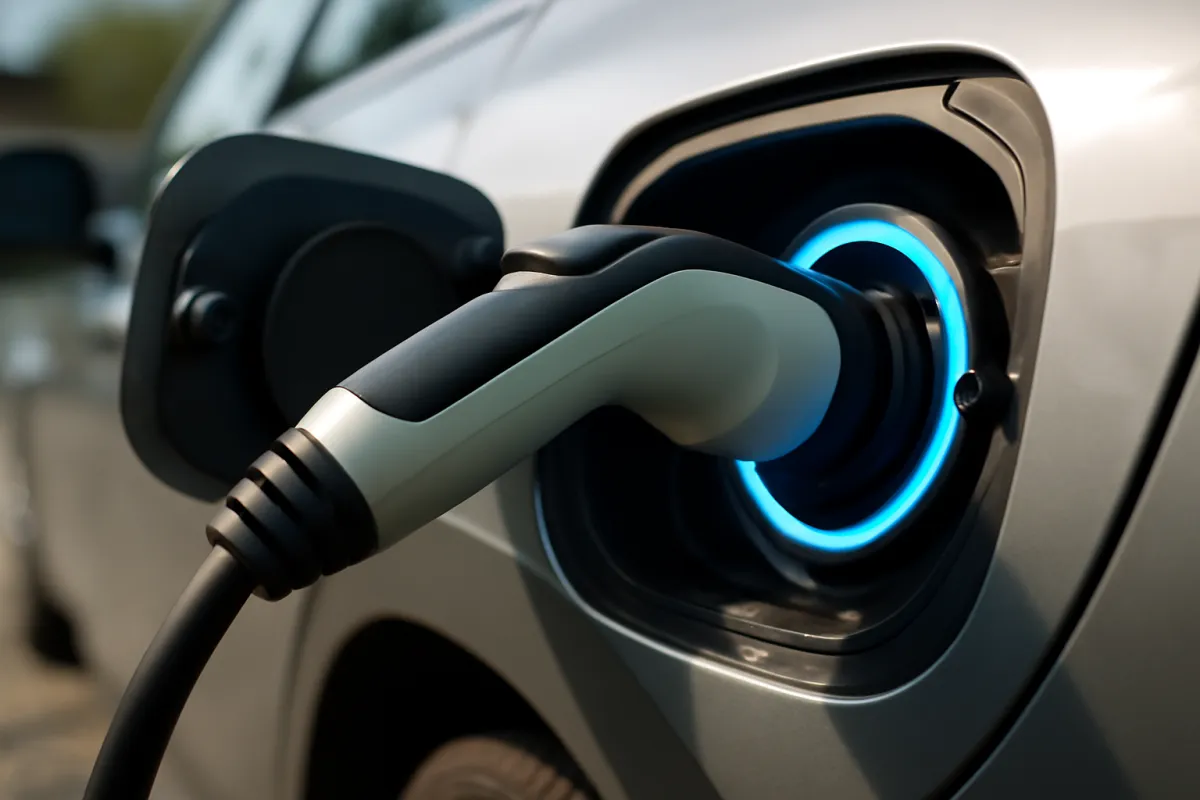
When something does go wrong, the causes are few and diagnosable. A car that will not start charging is most often a schedule conflict (the car and the charger both told to wait) or a charge limit already reached, not a hardware fault; check the app before you check the wiring. A session that runs slower than expected usually means the car’s onboard AC limit, not the charger, is the ceiling, or that a shared circuit is throttling under load management. A breaker that trips repeatedly is a genuine signal to call the electrician back, since it points to a circuit issue rather than a nuisance, and it should never be repeatedly reset without a diagnosis. The caveat that covers all of it: high-voltage troubleshooting is the electrician’s job, not yours; your job is to read the app, keep the connector healthy, and know when the symptom has crossed from software to wiring.
Illustrative monthly home-charging cost by miles
Every decision above eventually shows up as one line on your electric bill, and that line is refreshingly predictable, because it is simply your miles times your cost per mile. The chart puts illustrative monthly figures next to common mileages at a 15 cent home rate and 30 kWh per 100 miles, so you can find your own row.
Illustrative monthly home-charging cost by miles driven
At a 15 cent per kWh home rate and 30 kWh per 100 miles; off-peak rates run lower.
Each bar is that mileage times 30 kWh per 100 miles times 15 cents. Shift to an illustrative 8 cent off-peak rate and every figure drops by roughly half, which is why step six is the highest-yield setting on the whole system.
The chart also frames the off-peak lever plainly. Halving the rate halves every bar, so the single most valuable thing you can do after plugging in is move those kWh to the cheapest hours your utility sells. Read your own bill for the actual rate, since 15 cents is a common illustration, not your number.
Where EV owners actually charge
The reason home charging dominates the ownership case is that it dominates the actual charging, and seeing the split explains why the whole practice is worth setting up well. The illustrative breakdown below shows where a typical home-charging owner’s energy comes from over a month.
Where a typical home-charging owner gets their energy
Illustrative monthly share of miles by charging location.
Illustrative shares summing to 100 percent. For most owners the overwhelming majority of miles come from the driveway, which is exactly why a well-set-up home charge, on an off-peak schedule, decides the running cost of the car.
The takeaway is not the exact percentages, which vary by driver, but their shape: home is the base load and everything else is the exception. Get the home setup right and the occasional public session barely moves your monthly number.
Home charging versus the alternatives
It helps to see why the driveway wins so decisively, because the gap is what justifies setting the whole thing up carefully. Home charging on an ordinary residential rate costs an illustrative 4 to 5 cents per mile, and on an off-peak plan closer to 2 to 3 cents. Public DC fast charging, the road-trip option, commonly runs two to four times more per unit of energy, because the provider is paying for expensive high-power hardware, real estate, and grid demand charges that all load onto the price you see, which can push everyday fast charging to 12 to 15 cents per mile or beyond. Gasoline sits in between: a 30 mpg car at $3.50 a gallon is roughly 12 cents per mile to fuel. The honest ranking, at illustrative figures, is home off-peak cheapest, then home flat rate, then gasoline, then public fast charging.
That ordering is the entire reason home charging carries the ownership case. An EV charged mostly at home is fueling at a fraction of what the same miles cost in gasoline, while an EV leaning on public fast charging can quietly cost as much to run as the gas car it replaced. This is not an argument against public charging, which is exactly right for the occasional long trip, but against making it your default, and it is why our ownership math and cost-per-mile teardown keep returning to where you plug in as the variable that decides everything.
The practical upshot for setup: the effort you put into steps two through six, a right-sized charger on a healthy panel running an off-peak schedule, is what locks in the cheap end of that range for years. Confirm your own rate on your bill, since the cents above are illustrations rather than your exact number, and run your figures through the calculator.
A worked example: charging one EV at home
Walk one illustrative household through all seven steps with numbers. Dana drives about 40 miles on a typical day, parks in an attached garage every night, and has just bought an EV whose onboard AC limit is 11 kilowatts. Step one: those 40 daily miles would technically survive on Level 1’s overnight refill, but with a long-errand day most weeks Dana wants the margin, so Level 2 it is. Step two: an electrician’s load calculation on the 200 amp service (gas heat, gas range) shows comfortable headroom and two open slots, so no panel upgrade.
Step three: Dana skips the 80 amp flagship (the car could not use it and the panel would strain) and picks a 40 amp hardwired unit with scheduling and energy metering, which at 125 percent needs a 50 amp circuit, adding about 30 miles of range per hour. Step four: Dana writes the spec, collects three quotes on it, picks the licensed and insured mid-quote with the permit included, and confirms a local utility rebate. Step five: a one-day install mounts the unit on the garage wall within easy cable reach of the charge port, followed by a passed inspection.
Step six is where the money shows up. Dana enrolls in the utility’s EV rate plan and sets the car to charge inside an 11 p.m. to 7 a.m. off-peak window. The daily 40 miles need about 12 kWh (40 times 30 divided by 100), which at 30 miles per hour is a little over an hour of charging, trivially inside the overnight window. At a 15 cent flat rate that 12 kWh a day is about $1.80, roughly $54 a month; on the 8 cent off-peak rate it is about $0.96 a day, near $29 a month, a saving of about $25 every month for a schedule set once. Step seven is a monthly glance at the connector and nothing else. The lesson: the hardware was the small part, and the schedule in step six is what turned an ordinary bill into a low one.
Common mistakes to avoid
The failure modes here are almost never electrons; they are decisions made out of order or setup skipped for haste. These are the ones that cost real money or real safety.
- Buying Level 2 before testing Level 1. Low-mileage drivers with overnight parking often live fine on a free outlet. Run Level 1 for a few weeks first and let the meter, not the sales page, decide whether you need the install.
- DIYing the 240 volt wiring. A continuous-load circuit is licensed-electrician, permitted work. Homeowner-run charger wiring is a documented fire and insurance risk, and the labor saved is small against the stakes.
- Skipping the load calculation. Buying the charger before the panel is checked is how people discover mid-install that the real project is a $2,000-plus service upgrade. The worksheet is cheap; the surprise is not.
- Leaving charging at peak rates. A charger that starts the instant you plug in can cost nearly double an off-peak schedule for identical energy. Setting the schedule once is the single highest-return five minutes in the whole setup.
- Running two schedules at once. Telling both the car and the charger to delay is the most common reason a car mysteriously does not charge overnight. Pick one place to set the schedule and leave the other on immediate.
- Ignoring a warm plug. A connector that runs hot after a session is the one symptom to act on, not watch, since it points to a receptacle or connection issue that upkeep or an electrician should address before it worsens.
Troubleshooting: slow charges, tripped breakers, and no garage
What if the car charges slower than the charger’s rating? Nine times in ten the ceiling is the car’s onboard AC limit, not the wall unit, so a 48 amp charger feeding a car that accepts 7.7 kilowatts simply delivers 7.7 kilowatts. Check the car’s spec before suspecting the hardware. A shared circuit under load management can also throttle deliberately while a big appliance runs, which is the system working as designed, not a fault.
What if the breaker trips repeatedly? Treat that as a call-the-electrician signal rather than a reset-and-hope one. Repeated trips point to a circuit, breaker, or connection issue that wants a diagnosis, and repeatedly resetting a tripping breaker on a large continuous load is exactly the pattern safety rules exist to prevent. This is squarely the electrician’s territory, not a homeowner fix.
What if you have no garage, or you rent? A driveway or carport takes an outdoor-rated Level 2 unit on a weatherproof circuit without drama, since the hardware is built for weather. Renters have a narrower but open path: Level 1 from a nearby outlet carries many low-mileage drivers with zero installation, and a conversation with the landlord framed around durable property value sometimes yields a cost split. In condos and apartments with assigned parking, right-to-charge rules in a growing list of jurisdictions require some associations to permit owner-funded installs under reasonable conditions, a path that runs through the board in writing. Confirm the specific rule in your jurisdiction before counting on it.
The home-charging checklist
The whole practice, in the order it should happen.
- Log two weeks of real driving. Daily miles decide Level 1 versus Level 2 before anything else does.
- Try Level 1 first if your miles are modest. A standard outlet and the included cord cost nothing and may already keep up.
- For Level 2, load-calculate the panel first. An electrician’s worksheet on capacity, slots, and whether load management beats an upgrade.
- Check the car’s onboard AC limit. Buy the smallest amperage the car and panel can honestly use, not the spec sheet’s biggest.
- Spec it in writing, get two or three quotes. Licensed and insured, permit included, receptacle grade named if plug-in.
- Permit on, licensed electrician on the tools, inspection done. File the signed permit with the house documents.
- Enroll in an off-peak rate and set the schedule once. This is where the savings live; set it in one place, not two.
- Glance at the connector monthly. Keep it clean, dry, fully seated, and act on any warmth at the plug.
An afternoon of choices, a day of professional wiring for those who go Level 2, and the cheapest fuel pump you will ever own runs itself in your driveway.
The bottom line
Charging an electric car at home is less a project than a habit with a good setup behind it. The setup is seven ordered steps: understand the levels, assess the panel, choose the charger and amperage, hire a licensed electrician and pull the permit, install and mount, set the off-peak schedule, and keep the connector healthy. The habit is one move: plug in when you arrive and wake up full. Most of the value is not in the hardware at all but in step six, the schedule that quietly halves the bill, and in the honest possibility that step one ends with a free Level 1 outlet doing everything your driving needs. Price your own version with our calculator, give Level 1 its fair trial if your miles are modest, and remember the one line that never bends: you plan and schedule it, a licensed electrician wires it.
We love this stuff, but we are enthusiasts, not your electrician or your utility. Treat everything above as educational and general: the charging speeds, rates, costs, and savings are illustrative figures that shift with your home, your car, your utility, and your region. This teardown plans and schedules home charging; it does not authorize you to perform electrical work. All 240 volt wiring must be carried out by a licensed electrician under the proper permit and inspection, so confirm local requirements with your authority having jurisdiction, and verify any rate plan, rebate, or incentive with your utility and tax jurisdiction before you rely on it.
Frequently asked questions
How do you charge an electric car at home?
You plug it in where it parks, usually overnight. The simplest version needs nothing installed: Level 1 charging uses the cord that ships with most EVs plugged into an ordinary grounded household outlet, adding an illustrative 3 to 5 miles of range per hour. Most owners eventually add a Level 2 wall charger on a dedicated 240 volt circuit, which adds roughly 20 to 40 miles per hour and refills nearly any battery overnight. Either way the daily habit is identical: arrive home, plug in, and wake up to a full battery, ideally on an off-peak electricity rate.
Can I charge my EV at home without installing anything?
Yes. Level 1 charging works from a standard household outlet with the portable cord most electric cars include, at an installation cost of exactly zero. It adds an illustrative 3 to 5 miles of range per hour, roughly 35 to 50 miles over a long overnight session, which genuinely covers low-mileage drivers with reliable overnight parking. Run Level 1 for a few weeks before committing to a Level 2 install: your electricity meter will tell you honestly whether you need faster charging or whether the free option already keeps up with your driving.
How much does it cost to charge an EV at home?
It scales with your miles and your electricity rate. Illustratively, at a common home rate near 15 cents per kWh and a typical efficiency of 30 kWh per 100 miles, home charging costs roughly 4 to 5 cents per mile, so about $45 a month for 1,000 miles of driving. Charging overnight on an off-peak rate can pull that closer to $24 for the same miles. Confirm your own rate on your utility bill, since time-of-use and EV-specific plans change the math substantially, and expect winter months to run a little higher.
How many amps do I need to charge an EV at home?
For Level 2, a 40 or 48 amp charger suits most homes, adding an illustrative 25 to 35 miles of range per hour, which refills nearly any battery overnight. Electrical code sizes a continuous load at 125 percent, so a 48 amp charger wants a 60 amp circuit and a 40 amp charger a 50 amp circuit. Chasing maximum amperage pays off less than people expect, since overnight is overnight and your car's onboard AC limit often caps the real speed anyway. Size to your driving and your panel, not the spec sheet's biggest number.
Is it cheaper to charge an EV at home at night?
Usually, yes, and often meaningfully so. Many utilities offer time-of-use or EV-specific rate plans that price overnight electricity well below the daytime rate, because grid demand is lowest while you sleep. Illustratively, shifting 300 monthly kWh from a 15 cent flat rate to an 8 cent off-peak rate turns about $45 into roughly $24, a saving of around $250 a year for a one-time enrollment and a schedule set once. Almost every EV and Level 2 charger can start automatically at a chosen hour, so the saving requires no nightly effort once configured.
Do I need a licensed electrician to charge my EV at home?
Only if you install a Level 2 charger, which requires a new 240 volt circuit for a large continuous load, work that must be done by a licensed electrician and, in most places, permitted and inspected. Level 1 charging from an existing outlet needs no electrician at all. If you go Level 2, do all the planning yourself (the level, the amperage, the location, the quotes) and hand a clean written spec to a professional for the wiring. The permit exists so an inspector catches wire-gauge and grounding errors before they turn into heat behind a wall.
Can I charge an EV at home without a garage?
Yes, with the right hardware. Outdoor-rated Level 2 chargers are built for driveway and carport mounting, and a licensed electrician can run a weatherproof 240 volt circuit to the parking spot. Renters and apartment dwellers have a harder path but not a closed one: Level 1 from a nearby outlet carries many low-mileage drivers, and right-to-charge rules in a growing list of jurisdictions require some associations to permit owner-funded installs. The constant is a dedicated place to park and plug in, not the presence of four walls and a roof.
Do I need the automaker's own home charger, like a Tesla home charger?
Usually not. Any Level 2 wall charger that fits your car's connector and amperage will charge the car; the brand on the box matters far less than sizing it to your driving and your panel. A branded unit such as a Tesla home charger, often called a wall connector, can be a clean match for that make and integrate neatly with the car's app, which is a genuine convenience, but a good third-party charger on the right circuit does the same job. Focus on the connector standard your car uses, the amperage your car and panel can honestly use, and whether the unit is outdoor-rated if it lives outside. Confirm connector compatibility for your specific model before buying, since adapters and native ports vary.
How long does it take to charge an EV at home?
It depends on how empty the battery is and your charging speed, not usually on the battery's full size, because you rarely charge from empty. Illustratively, replacing a typical day of 40 miles takes about eight hours on Level 1 or well under two hours on a 40 amp Level 2 charger. A full refill from near empty runs roughly overnight on Level 2 and can take more than a day on Level 1. For most owners the honest answer is that home charging takes zero minutes of waiting, because it happens while the car sits parked overnight.